Effortlessly Integrate SMS and Email Services with Repohive
Building Secure Email and SMS Authentication Systems
By the end of this session, you will be able to:
-
Understand the workflow of One-Time Passwords (OTP).
-
Configure API endpoints for SMS and Email providers.
-
Construct secure JSON payloads for authentication.
-
Implement error handling for failed transmission.
The High Cost of Insecurity
OTP (One-Time Password) is the ‘second key’ that prevents unauthorized access by sending a temporary code only the owner can see
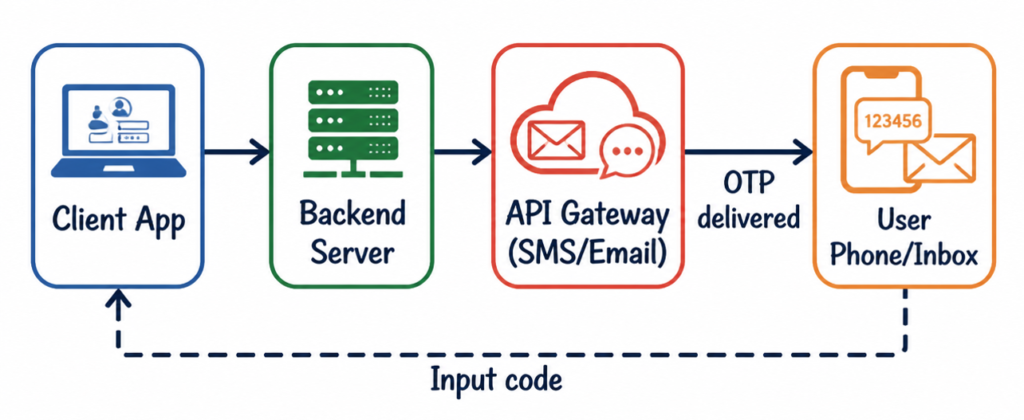
The OTP Workflow
The process moves from your application to a third-party gateway, then to the user.
Connecting to the API
Send OTPs via POST request with an API Key header and a payload containing the recipient and message.
Example
Example:
curl -sS -X POST "https://repohive.com/api/otp/send" \
  -H "Authorization: Bearer YOUR_KEY_HERE" \
  -H "Accept: application/json" \
  -H "Content-Type: application/json" \
  -d '{"phone":"09171234567"}'
Connect your web app
Laravel is the source of truth for SMS and OTP—this product hosts the HTTPS API. Your web app, mobile backend, or jobs are the client: they connect outbound to Laravel using an SMS API key. Keep that key on the server.
Steps
- Generate an SMS API key with the form on this page (keep sms checked), then copy the secret once it appears.
- Store it in a secret or environment variable on your own server—the client must never embed the key in frontend bundles.
- From your backend, call Laravel’s HTTPS API (outbound from your infrastructure to Laravel) with
Authorization: Bearer …andAccept: application/json. - For JSON bodies, send
Content-Type: application/json.
Calling Laravel directly from an end-user browser exposes your key. Your app should call your own backend first; only your backend should call Laravel.HTTPS API base your clients call (production is https://repohive.com/api; set REPOHIVE_CLIENT_API_BASE to override in docs): https://repohive.com/api
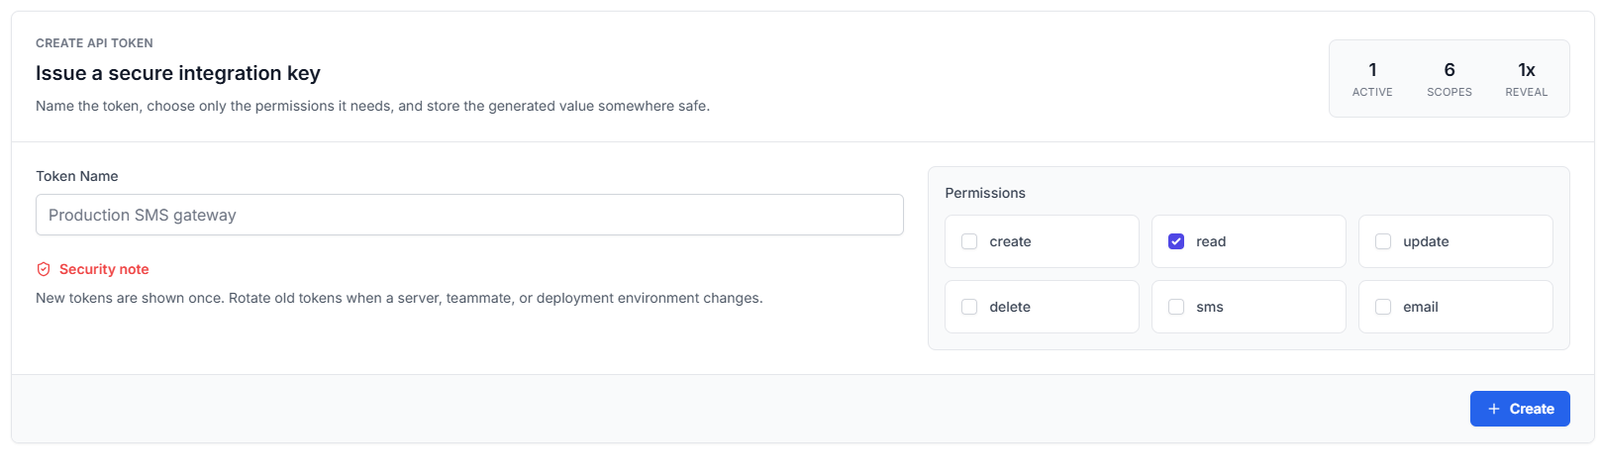
Generate SMS API key
This is your SMS secret—not a login password. Your server puts it in the Authorization header when it calls Laravel. Turn on the sms permission so OTP and credit routes work. Copy it once, then keep it in env vars or a vault.
Step-by-Step Setup Guide
Setting up your system to send OTPs (One-Time Passwords) via SMS and Email using Repohive. Follow the steps below:
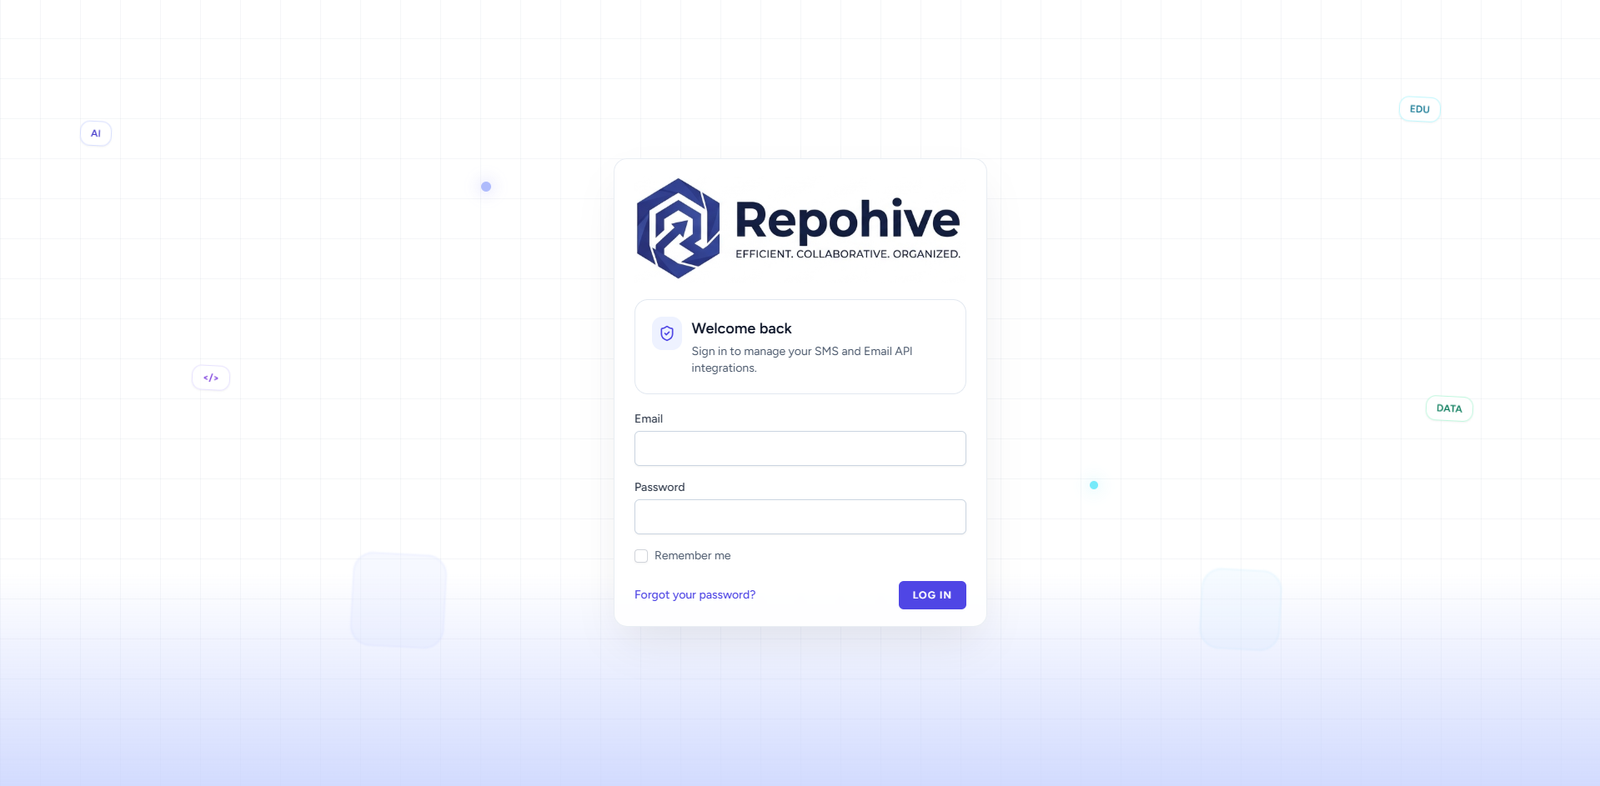
1. Access the Platform
- Open your browser and go to repohive.com.
- You’ll land on the homepage where you can begin the setup process.

2. Create Your Account
Click on Create Workspace and fill in the required details:
Submit the form to create your account.
- Full Name
- Email Address
- Password

3. Verify Your Email
After registration:
- Check your email inbox
- Look for the verification email from Repohive
- Click the verification link to activate your account
Tip: If you don’t see it, check your spam or junk folder.
4. Log In and Generate API Token
Once your account is verified:
- Log in to your Repohive dashboard
- Navigate to Settings or Developer/API Section
- Click Generate API Token
This token will be used to authenticate your application when sending OTP requests.
5. Integrate API into Your System
Now connect Repohive to your application:
- Use the generated API token in your backend (e.g., Laravel, etc.)
- Configure endpoints for sending OTP via SMS and Email
- Ensure your request headers include the API token for authorization
📌 Notes
- Each account is provided with 5 SMS credits for testing.
- Email OTP testing is unlimited, allowing you to fully test your integration without restrictions.