Laravel + Repohive EMAIL API: Complete Developer Guide

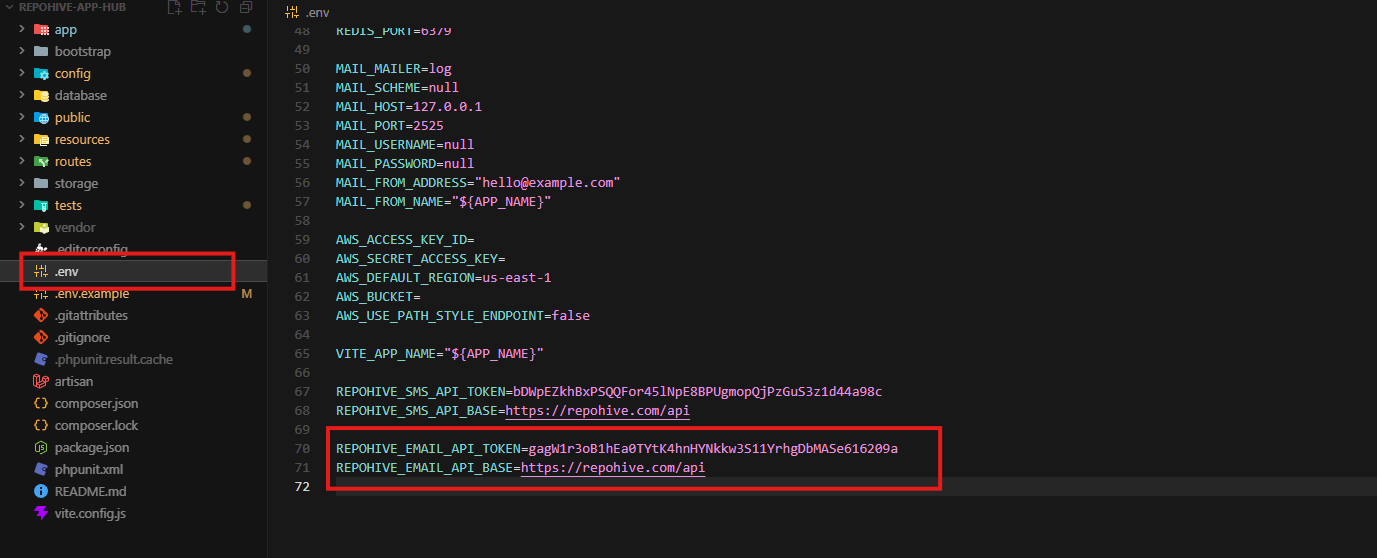
Step 1 — Configure Environment Variables
Open your project’s .env file and add the following configuration:
REPOHIVE_EMAIL_API_TOKEN=your-token-here
REPOHIVE_EMAIL_API_BASE=https://repohive.com/api
Description
REPOHIVE_EMAIL_API_TOKEN— Your Repohive Email API authentication token.REPOHIVE_EMAIL_API_BASE— The base API URL for sending email requests.
Replace your-token-here with your actual API token.
Step 2 — Configure Laravel Services
Open:
config/services.phpAdd the following configuration inside the returned array:
'repohive_email' => [
    'base_url' => env('REPOHIVE_EMAIL_API_BASE'),
    'token' => env('REPOHIVE_EMAIL_API_TOKEN'),
],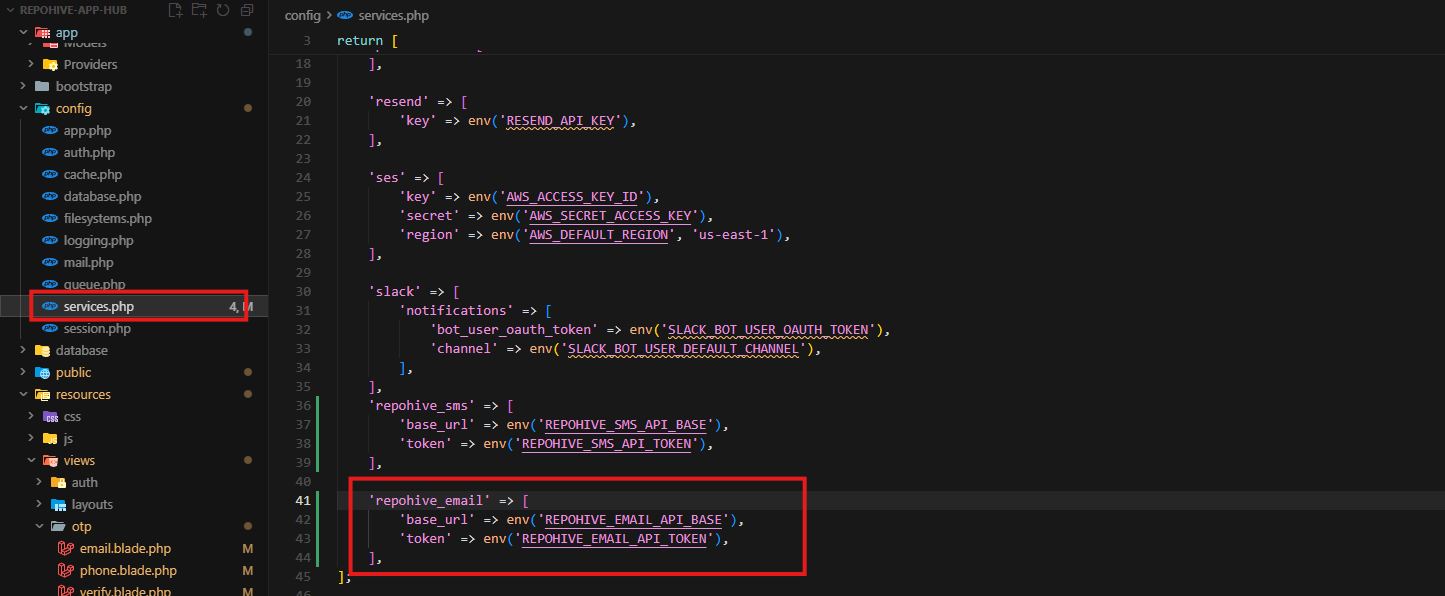
Description
This allows Laravel to securely access your Repohive Email API credentials using environment variables.
Step 3 — Clear Laravel Configuration Cache
Run the following command:
php artisan config:clearOptional cache rebuild:
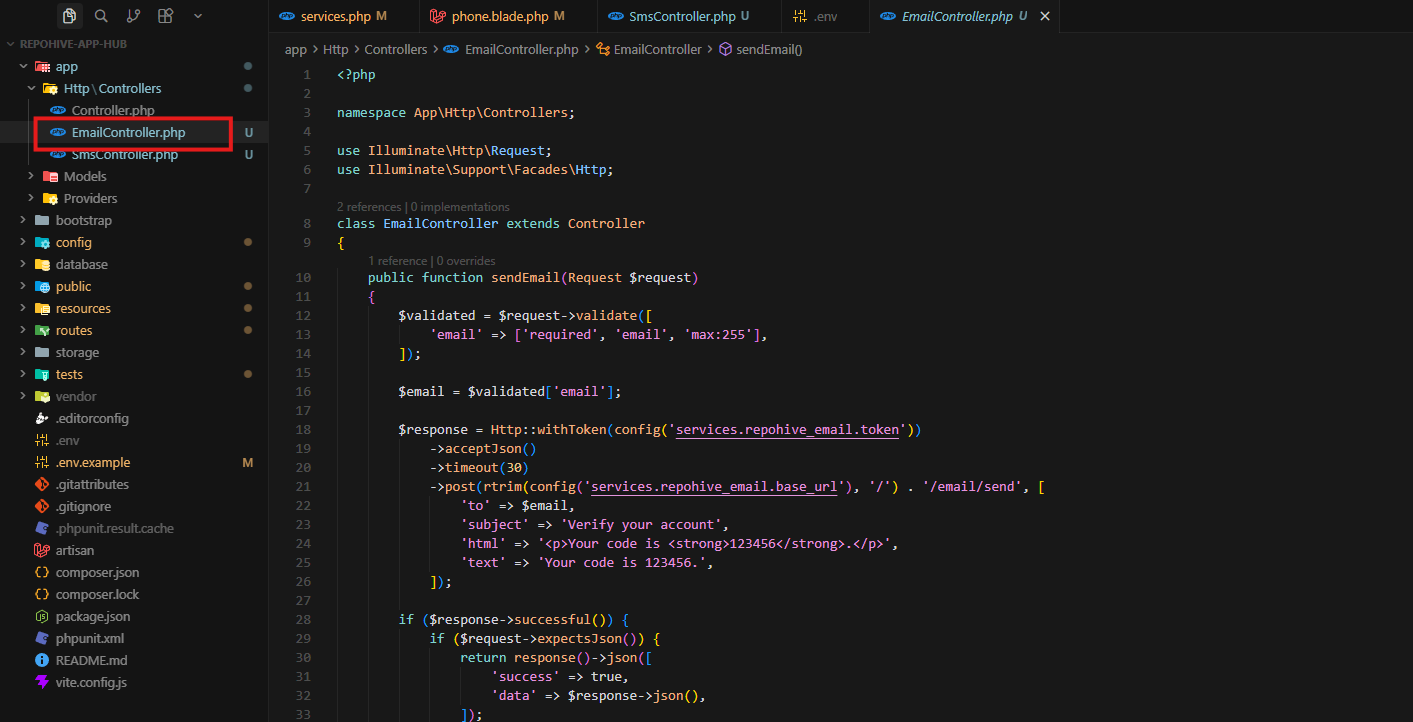
php artisan config:cacheStep 4 — Create the Email Controller
Generate a new controller:
php artisan make:controller EmailControllerStep 5 — Add the Email Sending Function
Open:
app/Http/Controllers/EmailController.phpAdd the following code:
<?php

namespace App\Http\Controllers;

use Illuminate\Http\Request;
use Illuminate\Support\Facades\Http;

class EmailController extends Controller
{
    public function sendEmail(Request $request)
    {
        $validated = $request->validate([
            'email' => ['required', 'email', 'max:255'],
        ]);

        $email = $validated['email'];

        $response = Http::withToken(config('services.repohive_email.token'))
            ->acceptJson()
            ->timeout(30)
            ->post(rtrim(config('services.repohive_email.base_url'), '/') . '/email/send', [
                'to' => $email,
                'subject' => 'Verify your account',
                'html' => '<p>Your code is <strong>123456</strong>.</p>',
                'text' => 'Your code is 123456.',
            ]);

        if ($response->successful()) {
            if ($request->expectsJson()) {
                return response()->json([
                    'success' => true,
                    'data' => $response->json(),
                ]);
            }

            return redirect()
                ->route('otp.verify')
                ->with([
                    'otp_target' => $email,
                    'otp_type' => 'email',
                ]);
        }

        if ($request->expectsJson()) {
            return response()->json([
                'success' => false,
                'message' => 'Failed to send email.',
                'error' => $response->json(),
            ], 500);
        }

        return back()
            ->withInput()
            ->with('email_error', 'Failed to send OTP. Please try again.');
    }
}
Step 6 — Register the Route
Open:
routes/web.phpAdd the following route:
use App\Http\Controllers\EmailController;

Route::post('/otp/email', [EmailController::class, 'sendEmail']);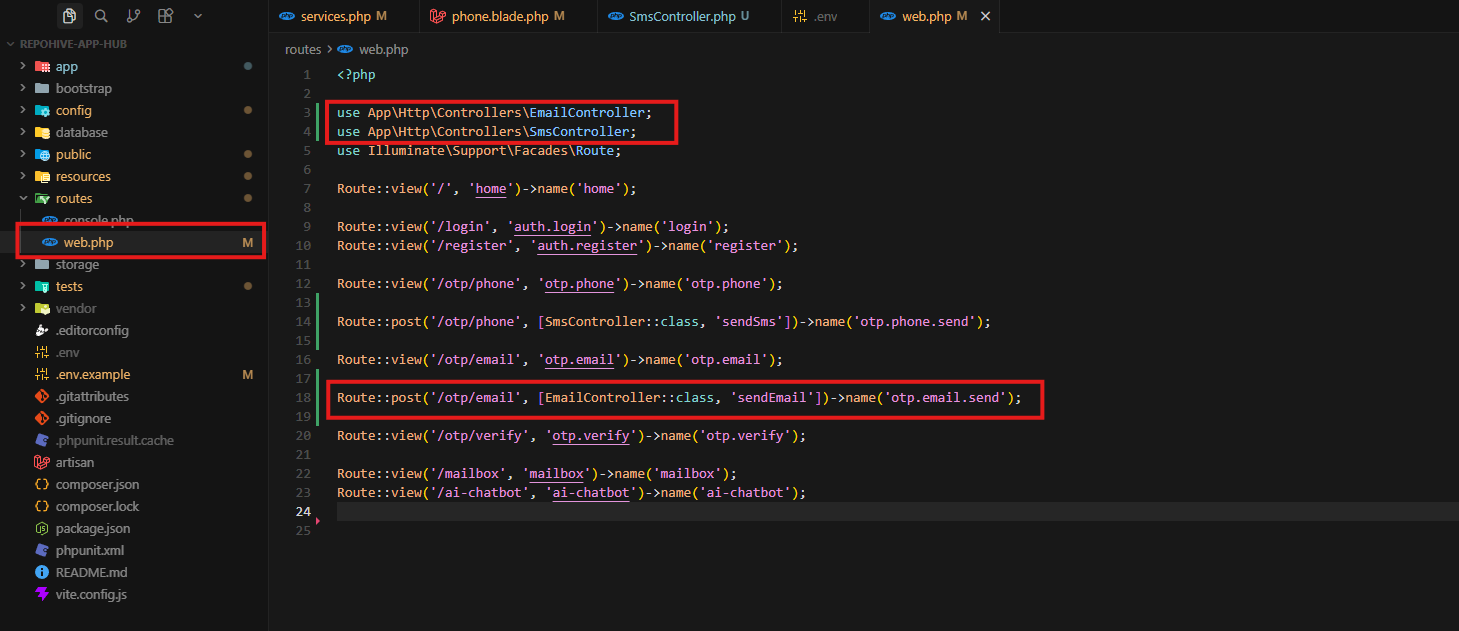
Example Endpoint
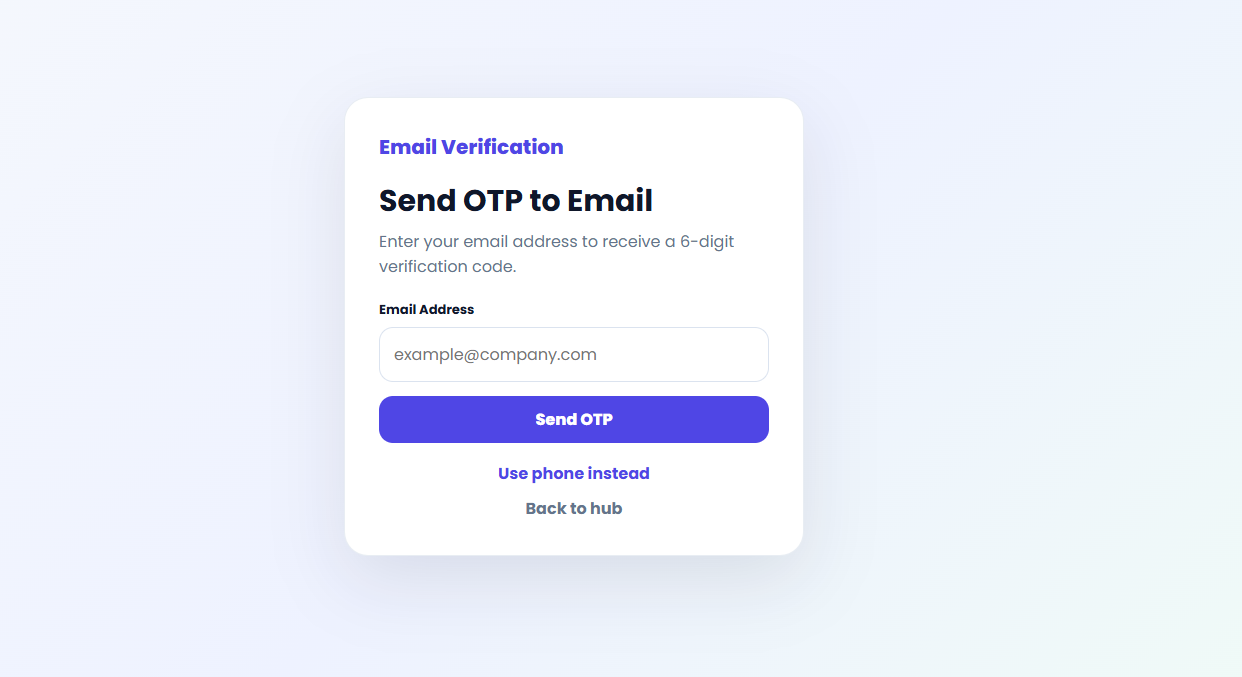
http://127.0.0.1:8000/otp/emailStep 7 — Test the Email API Integration
Start the Laravel development server:
php artisan serveVisit the route in your browser or API client to test the email sending functionality.
Step 8 — Verify the API Response
Successful responses will return JSON data similar to:
{
    "success": true,
    "data": {
        "message": "Email sent successfully."
    }
}