Laravel + Repohive SMS API: Complete Developer Guide

HTTP API reference and server-side examples for sending standard SMS messages.
Configure the .env file to connect the application to the API service securely. This setup includes adding the API endpoint URL and authentication token required for system integration and authorized requests. Ensure that all credentials are correct and properly saved before running the application.
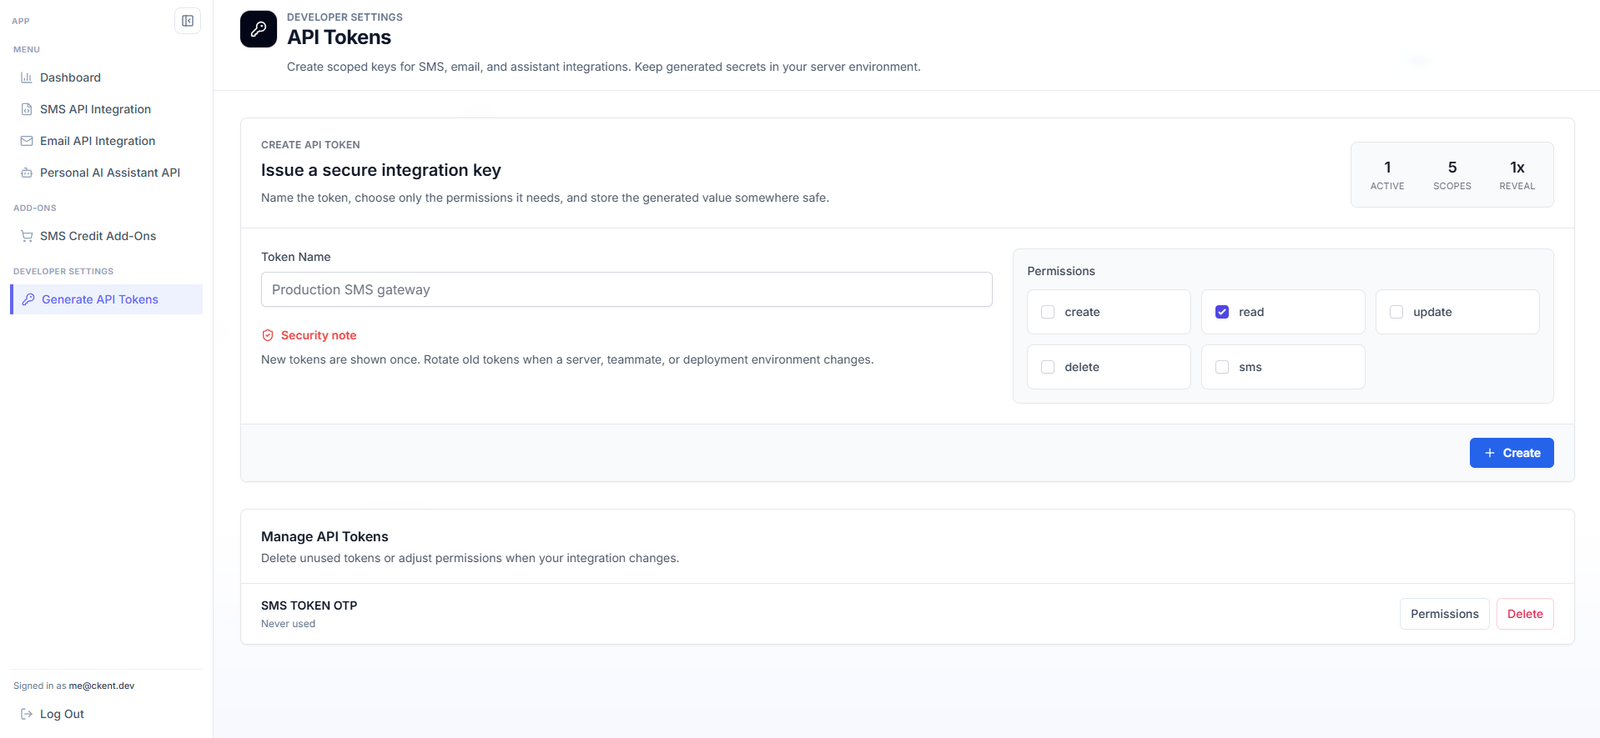
Step 1 — Configure Environment Variables
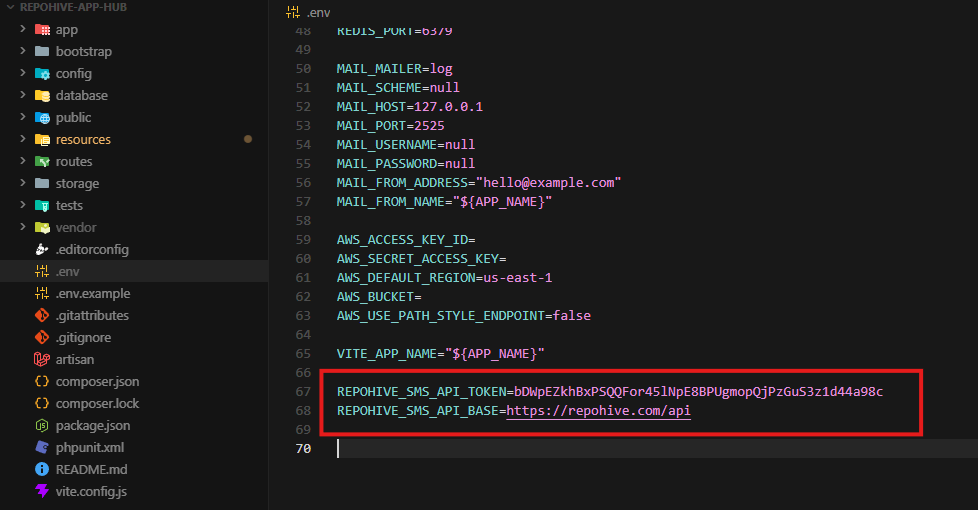
Open your project’s .env file and add the following configuration:
REPOHIVE_SMS_API_TOKEN=your-token-here
REPOHIVE_SMS_API_BASE=https://repohive.com/api
Description
REPOHIVE_SMS_API_TOKEN— Your authentication token provided by Repohive SMS API.REPOHIVE_SMS_API_BASE— The base API endpoint used for all SMS service requests.
Replace your-token-here with your actual API token credentials.
Step 2 — Configure Laravel Services
Open the following file:
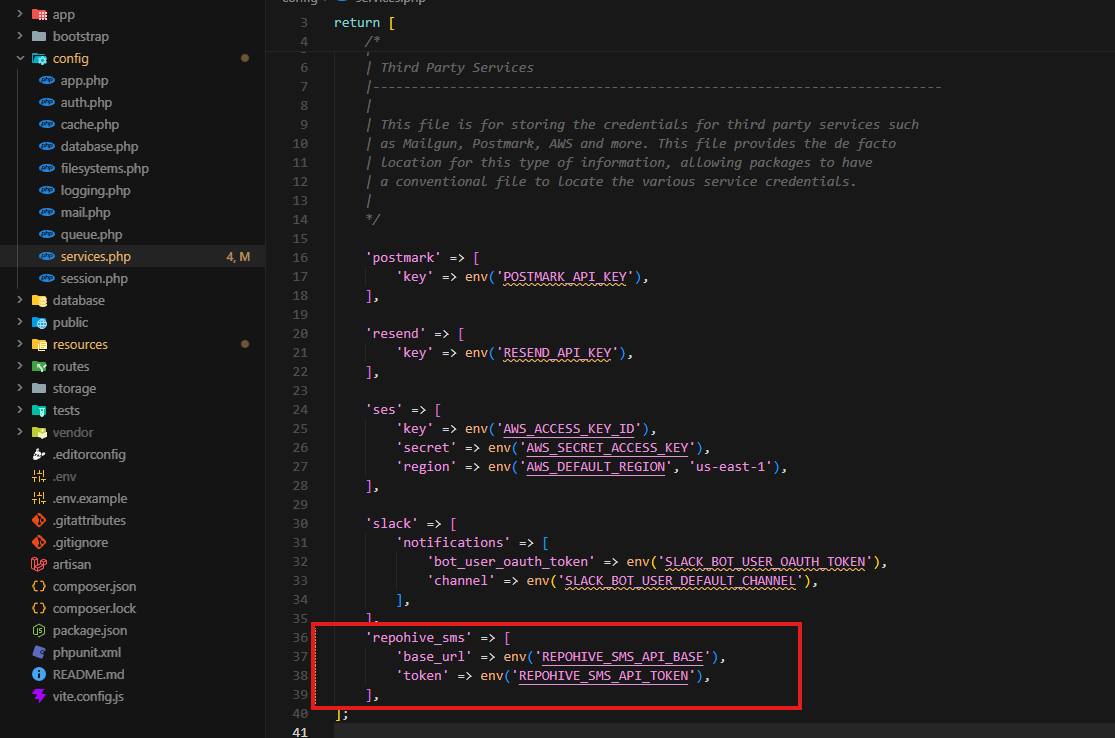
config/services.phpInside the returned array, add the following configuration:
'repohive_sms' => [
    'base_url' => env('REPOHIVE_SMS_API_BASE'),
    'token' => env('REPOHIVE_SMS_API_TOKEN'),
],
Description
This configuration allows Laravel to securely access the Repohive SMS API credentials from the .env file instead of hardcoding sensitive information directly into the application.
Step 3 — Clear Configuration Cache
After updating the configuration, run the following command to refresh Laravel’s cached configuration:
php artisan config:clearOptional cache refresh:
php artisan config:cacheStep 4 — Verify Integration
Test the SMS integration to confirm that:
- The API token is valid
- The API base URL is accessible
- SMS requests are successfully processed through the Repohive API service
Step 5 — Create the SMS Controller
Run the following Artisan command to create a new controller:
php artisan make:controller SmsControllerDescription
This command generates a new controller file located at:
app/Http/Controllers/SmsController.phpStep 6 — Add the SMS Sending Function
Open the SmsController.php file and add the following code:
<?php

namespace App\Http\Controllers;

use Illuminate\Http\Request;
use Illuminate\Support\Facades\Http;

class SmsController extends Controller
{
    public function sendSms(Request $request)
    {
        $validated = $request->validate([
            'phone' => ['required', 'string', 'max:30'],
        ]);

        $phone = $validated['phone'];

        $response = Http::withToken(config('services.repohive_sms.token'))
            ->acceptJson()
            ->timeout(30)
            ->post(
                rtrim(config('services.repohive_sms.base_url'), '/') . '/messages',
                [
                    'phone' => $phone,
                    'message' => 'Your verification code is 123456. Dont Share this to anyone!',
                ]
            );

        if ($response->successful()) {
            if ($request->expectsJson()) {
                return response()->json([
                    'success' => true,
                    'data' => $response->json(),
                ]);
            }

            return redirect()
                ->route('otp.verify')
                ->with([
                    'otp_target' => $phone,
                    'otp_type' => 'phone',
                ]);
        }

        if ($request->expectsJson()) {
            return response()->json([
                'success' => false,
                'message' => 'Failed to send SMS.',
                'error' => $response->json(),
            ], 500);
        }

        return back()
            ->withInput()
            ->with('sms_error', 'Failed to send OTP. Please try again.');
    }
}
Description
This controller method sends an SMS request to the Repohive SMS API and returns a JSON response indicating whether the request was successful.
Step 7 — Register the Route
Open the routes file:
routes/web.phpAdd the following route:
use App\Http\Controllers\SmsController;

Route::post('/otp/phone', [SmsController::class, 'sendSms'])->name('otp.phone.send');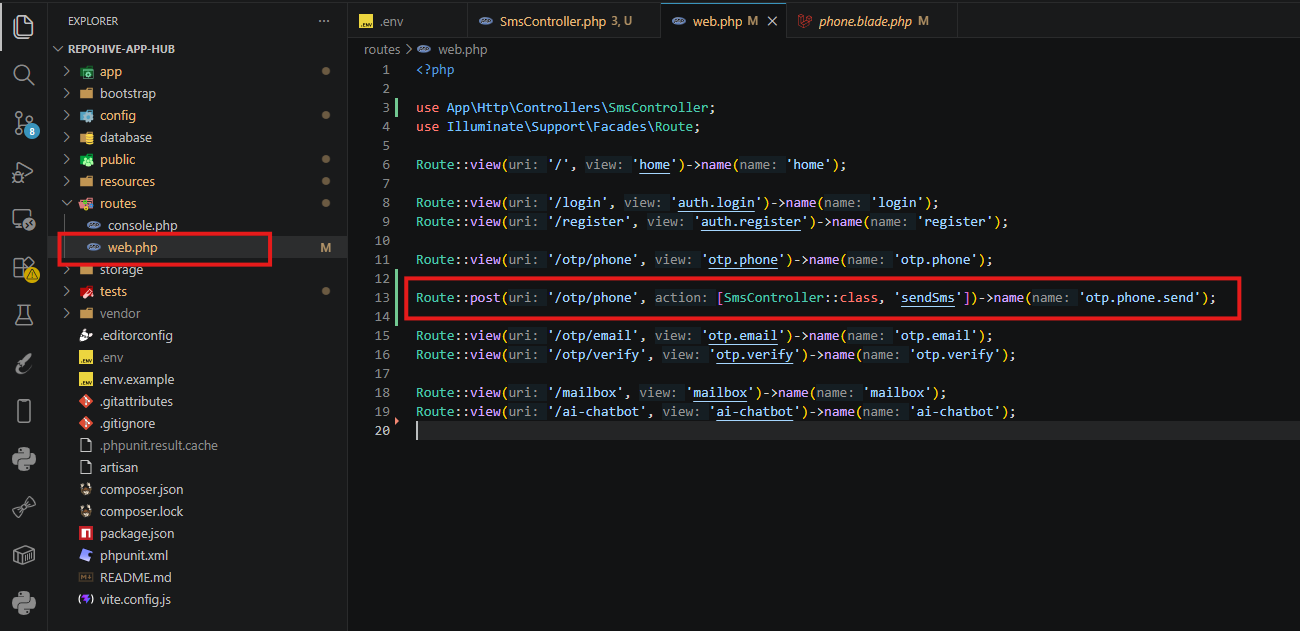
Description
This route creates an endpoint that triggers the SMS sending function when accessed.
Step 8 — Configure your blade form to send otp.
Access your blade format files under view structure folder.
        <form method="POST" action="{{ route('otp.phone.send') }}">
            @csrf

            <label for="phone">Phone Number</label>
            <input
                id="phone"
                name="phone"
                type="tel"
                placeholder="+63 900 000 0000"
                autocomplete="tel"
                value="{{ old('phone') }}"
                required
            >

            @error('phone')
                <p class="field-error">{{ $message }}</p>
            @enderror

            <button class="btn primary" type="submit">Send OTP</button>
        </form>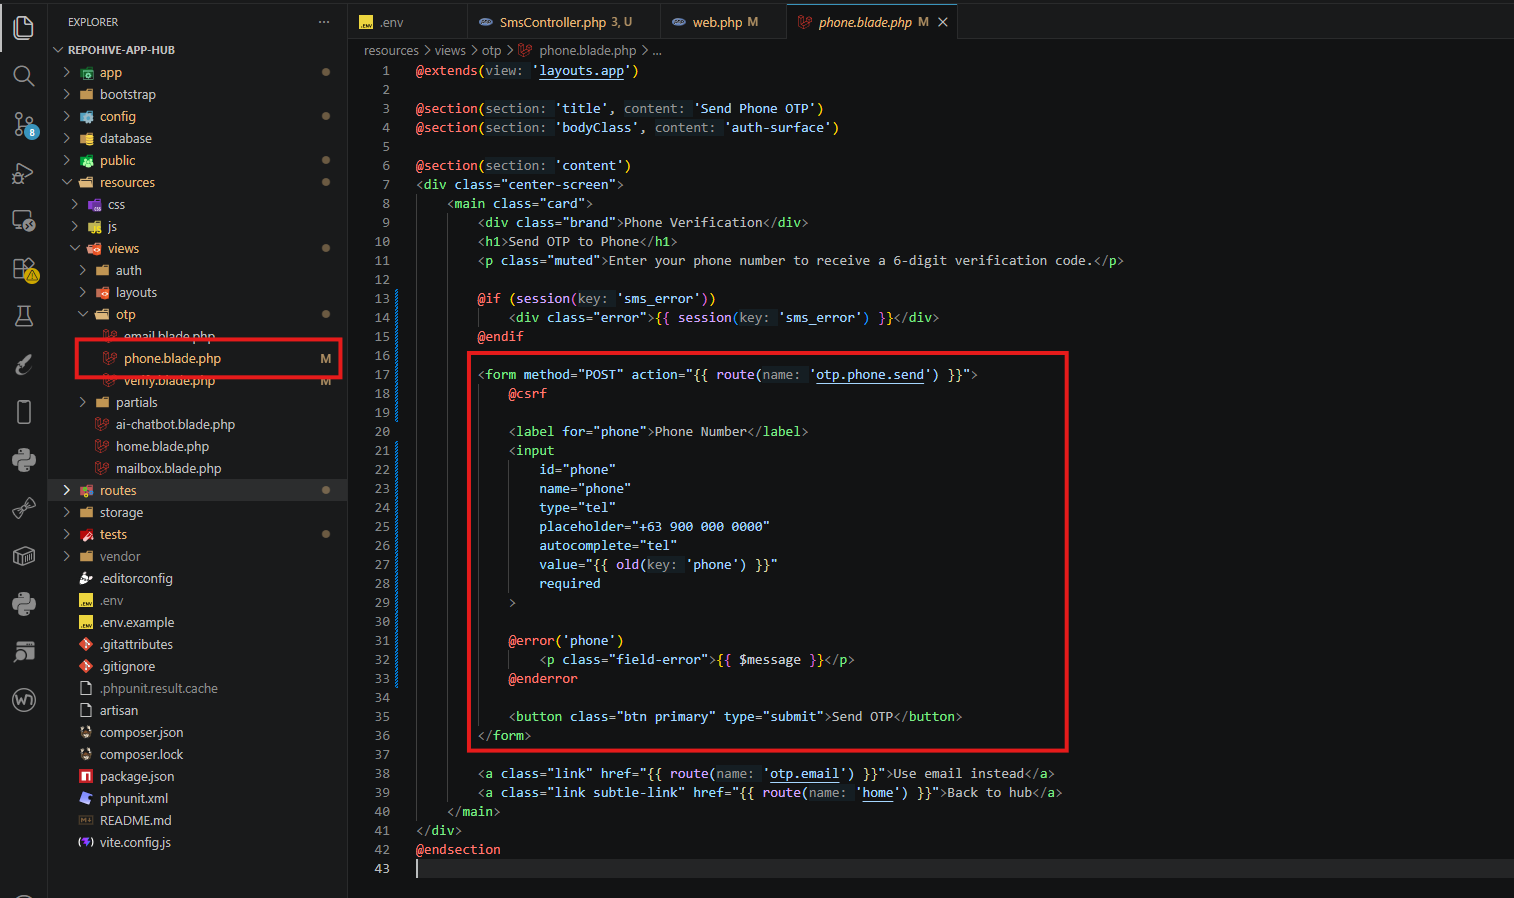
Example URL:
http://127.0.0.1:8000/otp/phone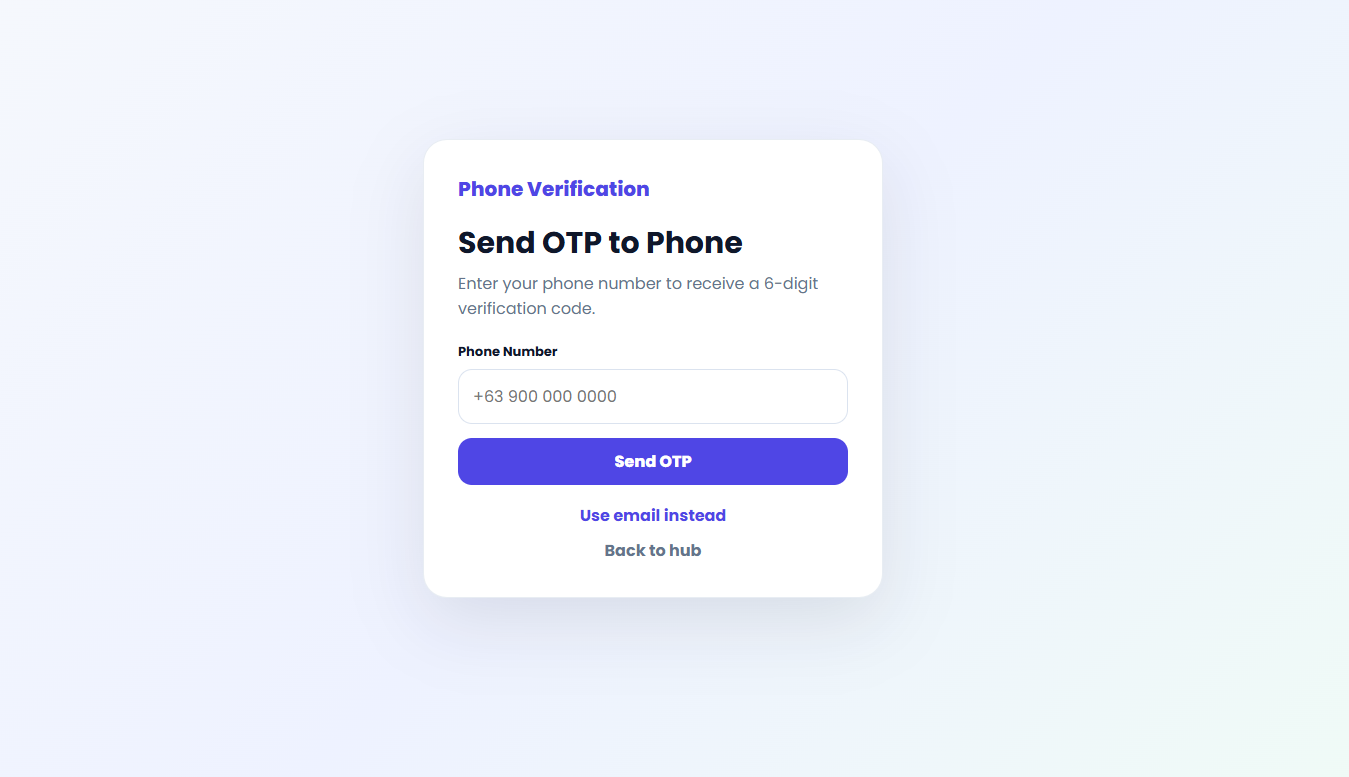
Step 8 — Run the Laravel Application
Start the Laravel development server:
php artisan serveThen open the route in your browser or API client to test the SMS integration.
Step 9 — Verify the SMS Delivery
After accessing the route:
- The API request will be sent to Repohive SMS API
- The response will be returned as JSON
- The recipient should receive the SMS message if the request is successful
📌 Notes
- Each account is provided with 5 SMS credits for testing.
- Email OTP testing is unlimited, allowing you to fully test your integration without restrictions.